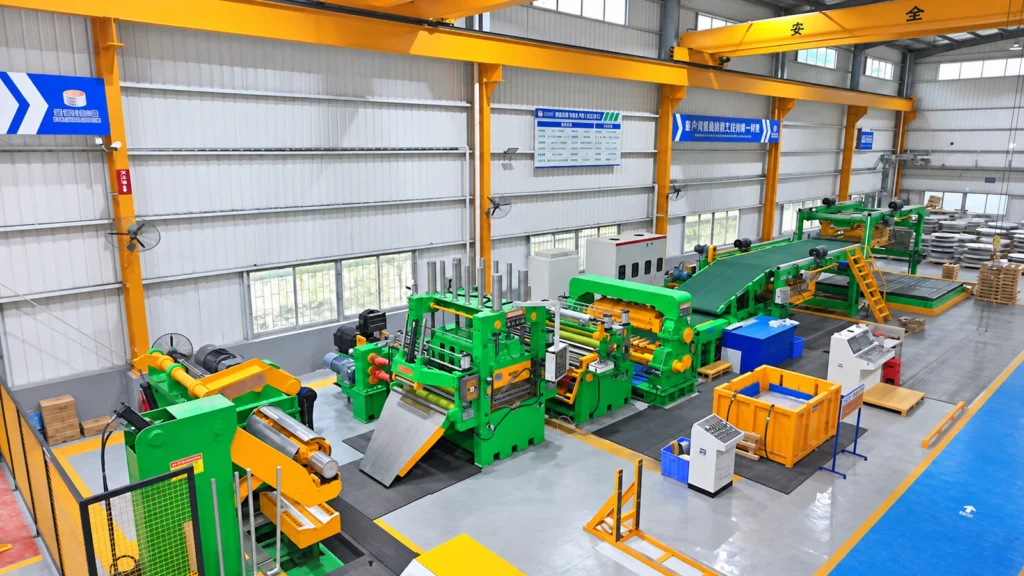
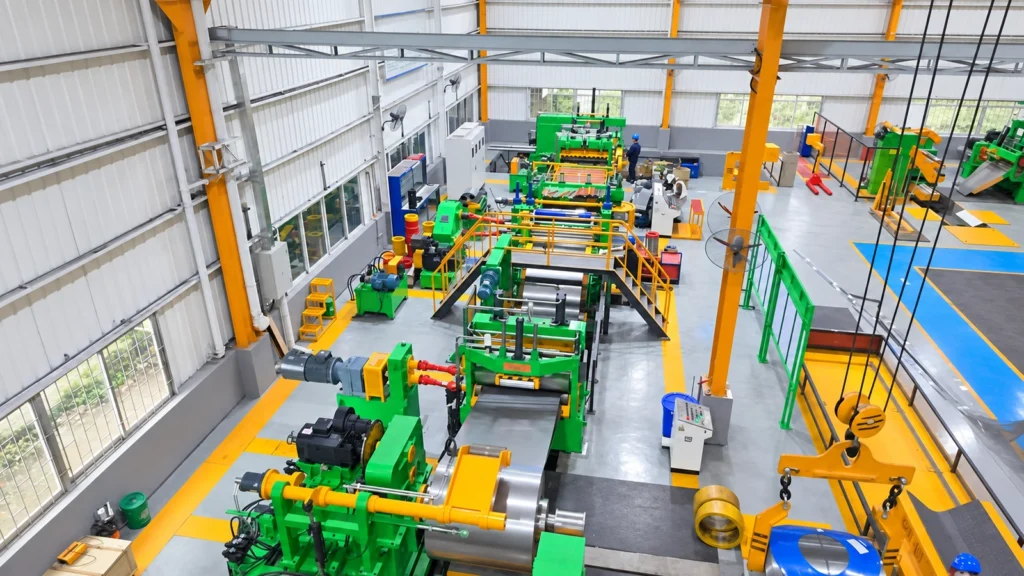
Slitting Line Coil Threading: A Practical Guide to Safer, Repeatable Changeovers
Coil threading is often treated as a short transition between one production order and the next. In practice, it is a control point for the entire slitting operation. The way a coil is received, centered, opened, guided and introduced into the line affects operator exposure, strip tracking, strip-edge condition, setup time and the stability of the first finished coils.
For processors working with thin, sensitive or high-value strip, an improvised threading routine can create more than a delay. A poorly prepared entry path may introduce lateral drift, unnecessary handling, surface contact or a rushed correction at the slitter. The strongest approach is not simply to make changeovers fast. It is to make them repeatable: the same verified sequence, clear responsibilities and known machine positions every time.
This article explains how buyers and production teams can think about slitting line coil threading as a controlled process. It is a practical guide, not a substitute for the equipment manufacturer’s operating instructions, site-specific risk assessment, training or applicable safety requirements.
Why coil threading deserves engineering attention
A slitting line transfers a wide coil through several connected functions: coil handling, payoff, entry guidance, slitting, scrap management, tension control and recoiling. During threading, the strip has not yet reached a steady-state condition. Operators may be confirming alignment, establishing a safe lead edge and verifying that the strip is following its intended path before line speed increases.
That makes the entry section especially important. A coil can be correctly specified and a slitter can be accurately set, yet the first meters of strip may still be compromised if coil centering or strip guidance is inconsistent. Repeatable threading reduces the need for last-minute corrections and helps the team identify whether a quality issue began at loading, at the entry guide, at the slitter or downstream.
It also creates a better handoff between operations. When every changeover uses the same checkpoints, shift teams can compare setup results, record exceptions and improve the process without depending on one operator’s memory.

1. Start with the coil and the loading plan
Before the coil reaches the uncoiler, confirm the order data that affects the setup: coil width, thickness range, inside diameter, outside diameter, coil weight, material condition, surface sensitivity and required strip widths. The handling method should match the coil’s actual dimensions and the rated capacity of the equipment in use. Do not rely on visual judgment alone when the order documentation or coil identification is available.
The loading plan should also define the coil orientation and the direction of payoff before the coil is moved into position. A correctly oriented coil reduces unnecessary handling after loading. The team should be able to verify the planned direction at a glance, rather than discovering it after the strip has been partially introduced to the line.
For buyers specifying a new line, this is why coil-car travel, lifting range, coil-support geometry and line access deserve the same attention as slitter horsepower. A coil-loading carriage should support a controlled handoff to the uncoiler, not add another awkward manual correction. The appropriate configuration depends on the coil data and layout, so it should be confirmed during engineering review.
2. Establish a clean, visible threading path
Once the coil is secured, the next objective is to make the intended strip path easy to inspect. Clear loose packing material, confirm that the entry table and guide rolls are free from unnecessary obstructions, and make sure the relevant movable devices are in their prepared positions. The goal is not cosmetic housekeeping; it is to make the lead edge, guide contact and potential pinch points visible before motion begins.
Where the process uses hold-down rolls, peelers, pinch rolls or driven entry rolls, their position and sequence should be defined in the work instruction. The crew should know which device establishes strip control first and which device remains disengaged until the lead edge has passed. This lowers the chance of two separate actions fighting each other or of the strip moving unexpectedly while a correction is being made.
A well-designed threading path also makes it easier to protect exposed material. For polished, coated or easily marked strip, review the contact surfaces and the cleanliness of rolls or tables before threading. Surface marks are often costly because they may appear only after the coil has progressed farther into production.

3. Center the strip before asking the slitter to correct it
Side guides are not a replacement for poor coil positioning. Their role is to establish and maintain the intended strip reference at the entry. If the coil starts substantially off center, the operator may be forced to make frequent corrections, increasing the chance of edge contact and lateral movement.
A good practice is to define a simple alignment check before the lead edge reaches the slitter. The team verifies that the coil centerline, entry guide setting and intended strip path agree with the production order. If a visual centerline, scale or digital position indication is available, use it consistently and record any nonstandard setting that was necessary for the order.
During the first slow movement of the strip, observe whether the strip is entering squarely and whether the tracking tendency changes after it passes each entry device. A small, early correction made at safe speed is easier to understand than a larger correction made when multiple rolls, knives and tension devices are already influencing the strip.
For a broader explanation of the line’s process flow, see what a slitting line does. The key point for changeover discipline is simple: each section should receive the strip in a controlled condition from the preceding section.
4. Treat the first strip movement as a verification stage
The first movement of the coil should be deliberate. It is the stage for confirming strip direction, lead-edge condition, basic tracking and the relationship between the entry equipment and the slitter. The line should remain at a safe, controlled setting until the team has verified that the strip is correctly positioned and that no unexpected contact is occurring.
Keep responsibility clear. One person should direct the sequence where the site procedure requires it; other team members should be positioned so communication is visible and safe. Controls, emergency-stop locations and the area around rotating components should remain accessible. No operator should enter a hazardous area to “follow” the strip while the equipment is running.
A useful setup record can include the coil ID, order number, entry-guide reference, unusual handling conditions, time to stable running and the corrective action taken if the first pass did not track as intended. Over time, this information reveals recurring sources of setup variation and helps engineering teams decide whether a guide adjustment, a work-instruction change or a mechanical inspection is needed.
5. Protect strip quality through the slitting section
When the lead edge approaches the slitter, the focus shifts from coil placement to controlled entry. The strip should arrive without excessive lateral motion or unstable tension. A slitter cannot consistently deliver the intended strip widths and edge condition if the feed into the knives is changing unpredictably.
Knife setup, spacer selection, overlap and clearance must be determined for the material and slit pattern by qualified personnel using the line’s documented procedures. During threading, the practical question is whether the strip is entering the knives in the expected position and whether the first slit strips remain stable as they leave the cutting section.
If the first strips show unusual wander, edge damage, waviness or inconsistent separation, resist the temptation to keep increasing speed while the cause is unknown. Pause and inspect the process in a controlled manner. The root cause may be upstream alignment, strip condition, tooling setup, tension behavior or another line-specific factor. Recording the condition before changes are made is often more useful than trying several adjustments at once.

6. Build repeatability into the operating standard
Repeatability is created by design and operating discipline together. On the equipment side, buyers can review coil-car positioning, uncoiler expansion, hold-down and peeler arrangement, entry-guide adjustment, line visibility, guarding, controls and service access. On the operating side, teams need documented coil-threading steps, handoff rules, inspection points and a process for escalating an abnormal condition.
A practical checklist should be short enough to be used, but specific enough to prevent omissions. It can cover coil identification, lifting and loading confirmation, coil orientation, equipment readiness, strip-path clearance, guide setting, controlled first movement, first-strip inspection and stable-running approval. The exact checklist should be adapted to the line configuration and the customer’s safety program.
For applications that demand tight strip control, it is helpful to involve the equipment supplier early. For example, the design review for a high-precision 650 mm slitting line should consider the intended coil range, materials, downstream recoiling method and plant workflow together. No single component determines repeatable changeovers; the result comes from the relationship between the whole entry-to-recoil process.
Questions buyers should ask before finalizing a slitting line
- How will coils be loaded, centered and transferred to the uncoiler for the actual coil range?
- Which entry devices control the lead edge during threading, and how are they adjusted?
- Can the operator see the important entry and slitter reference points from the designated control position?
- What access, guarding and interlocks are provided for normal threading and setup work?
- Which operating positions, guide settings and inspection points should be documented by the production team?
- How will the line configuration change for surface-sensitive, narrow-strip or high-value materials?
A controlled start supports a stable finish
Fast changeovers are valuable only when they deliver a stable line. A disciplined slitting line coil-threading process helps make the first meters of strip easier to control, the first finished coils easier to evaluate and the whole changeover easier to repeat. By treating coil handling, entry guidance and first-pass verification as engineering steps—not informal transitions—processors can build a more reliable foundation for quality and throughput.